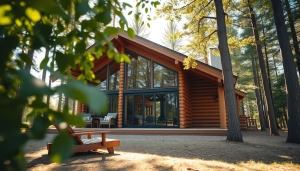
Building a log home can feel overwhelming at first. But when you break it down into steps, the process is much more manageable.
It all starts with a plan—choosing your design, setting a budget, and preparing the site. From there, you assemble your home piece by piece until it’s ready to move in.
At Tar River Log Homes, we believe hardworking families deserve sturdy, affordable homes. That’s why we provide quality logs and straightforward instructions to keep your build on track.
Whether you’re going the DIY route or hiring help, knowing the steps ahead of time keeps you in control and saves money. This guide walks you through each stage of log home construction, so you can build with confidence.
Planning Your Log Home Project
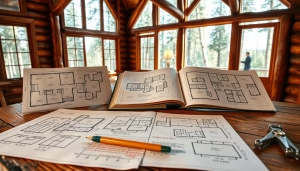
Planning out your log home takes some real thought—budget, timing, and picking the right spot all matter. You should also choose a design that fits your needs and style. Getting these details sorted early keeps things on track and stops costs from spiraling.
Setting a Budget and Timeline
Figure out your budget before you start. Count everything: land, materials, labor, permits, and a little extra for the things you didn’t expect. Be honest with yourself—no one likes nasty surprises.
Break your budget into chunks: foundation, logs, finishing, and so on. It’s easier to spot where you can save or need to splurge.
Set a timeline that works for your life. Don’t forget to factor in shipping times and whatever the weather throws at you. A flexible but clear timeline keeps things moving and your stress level down.
Choosing a Suitable Site
Scout out land with good drainage and solid ground. Steer clear of flood zones or spots that get hammered by snow or wind—those can mess with your home’s safety and lifespan.
Check for easy access to water, power, and roads. You’ll thank yourself later when you’re hauling in supplies or just living day-to-day.
Think about privacy, the view, and how far you’ll be from work or school. Picking the right spot can make your log home a joy for years.
Selecting Your Log Home Design
Pick a design that fits your budget and lifestyle. Simple plans go up quicker and cost less, while custom layouts look cool but take more time and money.
Think about how many bedrooms and bathrooms you need. Want open living spaces? Extra storage? Jot down your must-haves.
You can choose from cozy cabins to big family homes, with plenty of ways to make your dream happen. You get quality stuff and plenty of ways to make your dream happen.
Sourcing and Preparing Materials
You need solid logs, proper drying and treatment, and the right tools. Choosing quality materials from the start saves you a ton of trouble later.
Choosing the Right Logs
Pick logs that suit your climate and the look you want. Eastern White Pine is a favorite—it’s tough, easy to work with, and lasts. Look for logs that are straight, not full of big knots, and sized right for your walls.
You want logs cut to your plan for a tight fit and strong build. Skip any with rot or bug damage—they’ll just cause headaches.
Drying and Treating Logs
Logs need to be kiln-dried to control moisture and stop them from shrinking or warping as your house settles. This step really helps your walls stay tight.
Treat the logs with protective stains or sealants to keep out bugs, mold, and bad weather. It’s worth it—your home lasts longer and you’ll have less maintenance.
Gathering Construction Tools
You’ll need chainsaws, chisels, a log scribe, and a heavy-duty drill. A log handling tool or pulley system saves your back and makes things safer.
Keep your tools sharp and in good shape. Many suppliers offer these tools at fair prices, so you get decent gear without breaking the bank.
Site Preparation and Foundation
Before you can start building, you’ve got to prep the land and pour a solid foundation. This means leveling the ground, marking out where your house goes, and setting up sturdy footings.
Clearing and Leveling the Land
Clear the spot where your log home will stand. Get rid of trees, bushes, rocks, and junk. You want a flat, stable patch that won’t give you grief later. If the soil’s soft, you might need to pack it down or add fill.
Level things out by filling low spots and shaving down the high ones. Use a shovel or rent a small bulldozer if you need to. A flat base keeps water from pooling and causing trouble.
Laying Out the Foundation
Mark exactly where your house will sit. Use stakes and string to outline the foundation. Measure twice—mistakes here are a pain to fix.
Your foundation size should match your log home plans. Getting this right keeps everything square so your walls go up straight.
Pouring Concrete and Setting Footings
Dig trenches for footings deep enough to stay below the frost line—this helps prevent shifting when the ground freezes.
Pour in the concrete and let it cure. Then build your foundation walls with blocks or poured concrete, depending on your design. Make sure everything’s level and solid before you move on.
Assembling the Log Walls
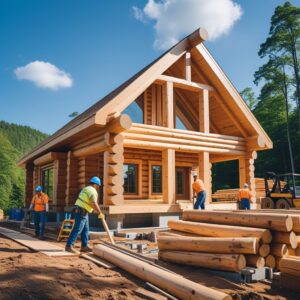
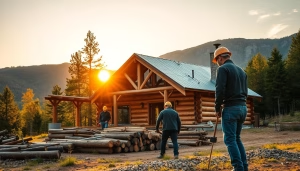
Building your log walls takes patience and attention. You’ll set the base logs, stack and lock each log, and cut out spaces for doors and windows. Done right, your home stays solid and draft-free.
Laying the First Course of Logs
Start by putting down the first row of logs on your foundation or sill plate. Keep them level and square—this row sets the tone for everything else. Check with a level and a tape measure often.
Drill holes for rebar or spikes to hold the logs down. If you’re using pre-cut logs, assembly becomes much easier. Press the logs tight together; gaps now could mean chilly drafts later.
Stacking and Securing Logs
Stack each log on top of the last, using notches at the corners to lock them in. This keeps them from shifting.
Drill through the logs for rebar or steel rods to add strength. Use insulation or foam strips between each course to keep drafts out and warmth in.
Take your time—strong walls come from a good fit and tight connections.
Cutting Openings for Doors and Windows
When your walls are high enough, mark where doors and windows go. Cut the openings carefully with a saw or chainsaw.
Add headers above the cuts to support the logs above. Install door and window frames before finishing the walls. Be precise—these openings affect your home’s look and how well it keeps out the weather.
Roof Construction
A sturdy roof keeps your log home safe from the elements. You’ll set up log trusses, add decking, and weatherproof it so rain and snow stay outside.
Installing Log Trusses
Lift each heavy timber truss onto your log walls. Bolt them down with steel brackets. The trusses carry the roof’s weight, so make sure they’re level and locked in tight.
Trusses usually go 4 to 6 feet apart, depending on your plan. You can add metal plates at joints for extra strength. Once they’re up, your roof’s ready for decking.
Adding the Roofing Deck
Lay down roof decking—usually plywood or tongue-and-groove boards—over the trusses. Nail the boards down tight.
If you use plywood, go for at least ¾ inch thick for strength. Decking gives you a solid base for shingles, metal, or whatever roofing you pick.
Weatherproofing the Roof
Cover the decking with roofing felt or synthetic underlayment to block moisture. Add flashing around chimneys, vents, and edges to seal up weak spots.
Finish with your roofing material—shingles or metal panels. Make sure overlaps are right and fasteners are solid to stop leaks. Choose roofing that balances cost and durability.
Doors, Windows, and Insulation
Getting doors and windows right makes your home comfortable and energy-efficient. You’ll need sturdy frames and good insulation to keep out drafts and moisture.
Fitting Doors and Frames
Pick doors that fit your log openings—sometimes you’ll need custom sizes since logs can be a bit uneven. Use strong frames to handle the weight and movement.
Secure the frame with long screws or bolts. Make sure the door swings freely and adjust if needed. Seal around the frame with caulk or foam to block drafts.
Adding metal flashing above the door keeps water out and helps prevent rot, especially if you get a lot of rain.
Installing Windows
Choose windows with wood or vinyl frames made for log homes—they won’t warp as easily.
Make sure the openings are square for a snug fit. Attach the windows with screws through the frame into the logs. Fill any gaps with chinking or backer rod and caulk to keep out air and water.
Consider double-pane glass or storm windows for better insulation. Don’t skip the flashing where logs meet the window frame—it keeps leaks at bay.
Insulating Between Logs
Logs alone won’t block every draft. Fill gaps with insulation made for log homes—gasket strips or foam backers work well. Add chinking or caulk over the insulation to seal joints. This blocks air leaks and water damage.
Good insulation keeps your home cozier in winter and cooler in summer. Quality products can help you get a tight, comfy home without extra hassle. Careful work here pays off every season when your home stays snug and dry.
Interior Finishing
Finishing the inside of your log home takes some planning. You’ll want to put up sturdy walls and ceilings, handle electrical and plumbing the right way, and pick flooring that matches your needs. These choices shape how comfortable and useful your home feels.
Partition Walls and Ceilings
Partition walls split up your rooms and add privacy. Use wood or metal framing, then cover with drywall or tongue-and-groove boards to match your log style.
Ceilings can be exposed beams for a rustic vibe or drywall for a cleaner look. Don’t forget to insulate well to keep the heat in.
Plan layouts early so running wires and pipes is easier.
Electrical and Plumbing Work
Run wiring and pipes after framing but before closing up walls. Think about where you want outlets, lights, sinks, and bathrooms. Sketch it out to dodge expensive changes later.
Use materials rated for log homes to prevent issues like moisture buildup. Hiring a licensed electrician or plumber—or at least following code—is a smart move.
Flooring Installation
Flooring sets the mood for each room. Hardwood, laminate, and tile are all solid picks for log homes. Make sure your subfloor’s flat and dry first—that stops squeaks and uneven spots.
Wood floors feel warm and classic, while tile’s a good call for kitchens and baths. Choose what fits your lifestyle and taste. Durable materials will help you build a solid, attractive interior.
Exterior Finishing and Landscaping
Finishing the outside of your log home protects it from the weather and boosts curb appeal. The right steps guard your logs and make outdoor spaces more inviting. Good landscaping ties it all together and makes your home feel like it truly belongs.
Staining and Sealing Logs
Staining and sealing your logs keeps out rain, sun, and bugs. Go for a stain made for log homes—something with UV protection and water resistance. Two coats usually do the trick, but let each dry before adding the next.
Before sealing, look for cracks or gaps in the logs. Fill them with a good caulk meant for log cabins. It’s a simple step, but it blocks moisture and helps avoid rot or mold.
Plan to re-stain every 3 – 5 years, or sooner if you see fading or peeling. That’s how you keep your place strong and looking sharp. Pre-treated logs can make finishing easier and save you time.
Decking and Porches
Decks and porches really open up your living space and add curb appeal. Pressure-treated wood or cedar lasts longer and stands up to bugs and weather.
Think about how you’ll move between the deck, doors, and yard. It’s worth making sure the foundation is solid—footings should go below the frost line so things don’t shift in winter. Stainless steel or galvanized fasteners help prevent rust and headaches later.
Add railings or steps that fit your log home’s vibe. You can stain the decking to match your logs, or go with a different color if you want something that pops.
Landscaping the Surroundings
Landscaping frames your home and helps manage water. Grade the soil so it slopes away from the foundation—nobody wants water pooling around the logs.
Try planting native shrubs and trees. They’re low-maintenance and good for local wildlife. Keep plants a few feet away from the house to cut down on moisture and pest issues.
Gravel or mulch beds around the home control weeds and stop soil erosion. Paths and outdoor lighting make your yard safer and more welcoming.
Gardens or flower beds by the porch add a bit of charm. These touches help your log home stay sturdy and look good for a long time.
Final Inspections and Maintenance
Finishing your log home takes more than just hammering in the last nail. You need to check every detail and get ready for regular upkeep. That’s how you keep your place safe, comfortable, and solid.
Conducting Final Walkthroughs
Take your time walking through the house. Check all the walls, windows, and doors for gaps or cracks. Look for uneven logs or spots where caulking’s missing. Jot down anything that needs fixing before you move in.
Test the plumbing and electrical outlets. Don’t skip the roof or foundation—catching problems now saves you a lot of trouble later.
Scheduling Professional Inspections
Some things need a pro’s eye. Bring in a building inspector to check structural stability. Make sure wiring and plumbing meet local codes. They’ll spot stuff you might not notice.
Get inspections done within a few weeks of finishing. That way, you can handle issues before they turn into big repairs. Keep all your inspection reports—they’re handy for warranties and insurance. Using reputable suppliers gives you solid documentation on build quality.
Establishing a Maintenance Routine
Logs need regular care to last. Plan to clean the exterior every year to get rid of dirt and mold. Reseal the logs every 3-5 years to keep water out—use a waterproof sealant made for log homes.
Inside, keep an eye out for signs of settling or shrinking, like gaps at corners. Clean the gutters often to prevent water damage. Write down your maintenance dates somewhere. Sticking to this routine helps protect your investment and keeps your home cozy for decades.
Resale Value and Investment
Well-built log homes hold their value and often appreciate, especially in desirable locations. Buyers are drawn to their character, durability, and energy efficiency.
According to NAHB research, log homes perform comparably to traditional homes in resale markets, making them a solid investment for families planning long-term.
Building a Log Home, One Step at a Time
A log home comes together through careful planning, quality materials, and steady progress. Breaking the process into steps makes it less overwhelming and more rewarding.
From choosing your design to sealing the final logs, each stage builds toward a strong, comfortable home that lasts for generations.
At Tar River Log Homes, we’re here to help families achieve that dream with affordable log kits and straightforward support.
Ready to get started? Contact us and take the first step toward building your log home.
Frequently Asked Questions
Building a log home isn’t just about stacking wood. You need a plan, a budget, and the right tools. Size, location, and whether you’re using your own logs or building off-grid all make a difference.
What are the essential steps in building a modern log home?
Pick your log home plan and get the permits sorted. Prep the foundation, stack the logs with tight corners, then install doors, windows, and roofing. After that, finish up the inside—insulation, wiring, all that stuff.
Can you build a log cabin economically and what are the cost-saving strategies?
Absolutely. Stick with a simple design and skip the fancy extras. Pre-cut log home kits cut down on waste and labor. Doing some jobs yourself—painting, installing finishes—saves cash too.
What is the process for constructing a log cabin using trees from your own land?
First, pick straight, sturdy trees and cut them safely. Strip the bark and let the logs dry out for a few months. Then, cut and notch them to fit your design. It takes more time and know-how, but you’ll save money on materials.
What are the considerations for DIY cabin building in a remote, off-grid location?
Plan for water, power, and waste since you probably won’t have utilities. Getting materials to the site can be tricky, so order everything ahead of time. Weather can slow you down, so build in warmer months and keep extra supplies on hand.
How much should you budget for constructing a log home of around 2000 square feet?
For a 2000 sq ft log home, you’re probably looking at $150,000 to $250,000, depending on location and finishes. Simpler designs and low-maintenance materials help keep costs down. Good quality and fair pricing help keep your budget in check.
What factors influence the cost of building a large 4000 sq ft log home?
When you go big—like 4000 square feet—you’re going to need a lot more logs, and that means more hands on deck and a longer build time. Costs climb fast. If you want a fancy design or top-tier finishes, well, expect to pay for it.
The land itself can throw you a curveball too; prepping the site, laying the foundation, running all those utilities—none of that’s cheap or simple. Honestly, if you want to keep your budget in check, you really have to plan every step.

